Get Vibe Coding Quickly - Dev Environment Installer for Windows
Everything you need to start coding with AI — installed in minutes with copy & paste
✨ Do This Now (It's Super Easy)
Press Win Key, type PowerShell, right-click it, and select Run as administrator. Click "Yes" when prompted.
Copy this line, paste it into PowerShell (Ctrl+V), and press Enter:
iex (irm 'https://wuu73.org/vibe/vibes.ps1')
That's it! The installer will guide you through the rest with an interactive menu.
📋 What Happens Next?
After running the command, you'll see a simple menu where everything is already selected. Just press Enter to install everything, or use arrow keys and spacebar to customize your selection.
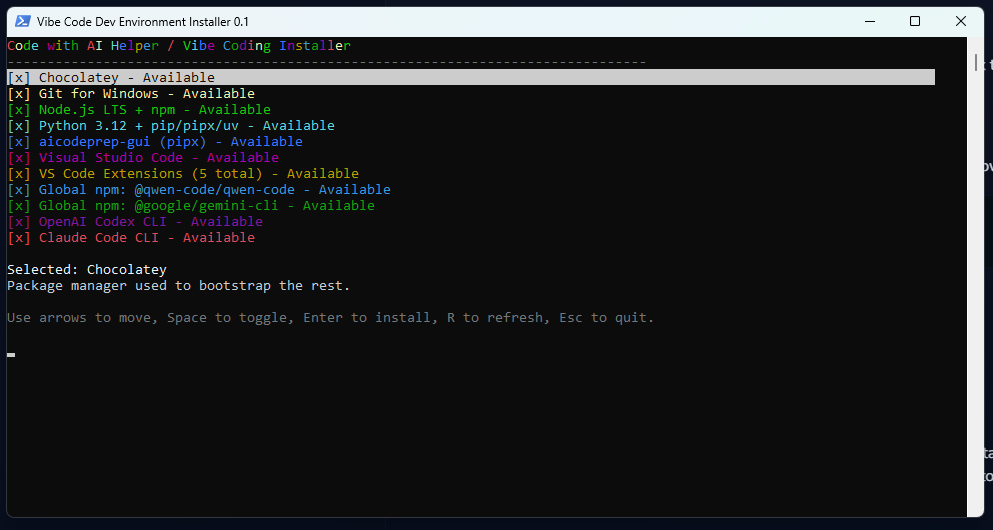
Installation takes 5-15 minutes depending on your internet speed. Perfect time for coffee! ☕
🎁 What You'll Get
A complete AI-powered coding environment with free tools and credits to get you started:
- Chocolatey
- Git for Windows
- Node.js LTS + npm
- Python 3.12 + pip/pipx/uv
-
aicodeprep-gui (aicp) Quickly switch between AI chats and project files
- Visual Studio Code
-
VS Code Extension: Cline AI agent using Qwen Code & free credits — enable in VS Code and select Qwen Code under "Use my own API key"
-
@qwen-code/qwen-code Free daily credits (~1k–2k uses/day). Used by Cline for AI coding assistance.
-
@google/gemini-cli High free credits after Google sign-in — follow CLI prompts to authenticate.
- OpenAI Codex CLI
-
Claude Code CLI Can use with the cheap $3/month GLM-4.6!
🚀 After You're Done: How to Run Everything
Once installation completes, here's how to launch your new tools:
Find it in the Start menu (press Win and type "Visual Studio Code"). Launch from there or pin to taskbar for quick access.
Open any terminal (PowerShell/CMD) or the integrated VS Code
terminal and type aicp then
Enter to run it.
To activate free Qwen Code credits: open the Start menu, type
cmd and open Command Prompt.
Type qwen and press Enter to
log in or create your Qwen Code account. After that, open VS Code,
click the Cline button on the left, choose
Use my own API key, and pick
Qwen Code from the dropdown. That will enable the
free daily credits for Cline.
Run gemini (or follow
provider's CLI instructions). Gemini CLI gives high free credits
after you log in with your Google account — follow the CLI prompts
to authenticate.
Run claude in your terminal
after installing to start the CLI. Follow prompts to sign in if
required. If you want to use the cheaper models from China like GLM 4.6, check out my guide.
Run codex or follow the OpenAI
CLI for Codex. For very large free daily tokens (250k–2.5M) enable
the sharing option on your OpenAI account at
platform.openai.com/settings/.../sharing
as described in account settings.
If a CLI prompts for authentication, follow the on-screen steps — often it will open a browser to complete OAuth with the provider. The 'how to' details above point to the most common steps for the tools listed.
Quick tip: Most CLI tools will work when ran in a cmd.exe or command prompt window, or git bash. On some default Windows systems, PowerShell might give an error about scripts unless you change PowerShell's execution policy.
🔍 For the Curious
Not sure how to do it and need more detailed steps? Or curious what the script does before running it? Or prefer manual installation?
Screenshots
If you need more help with the PowerShell steps:
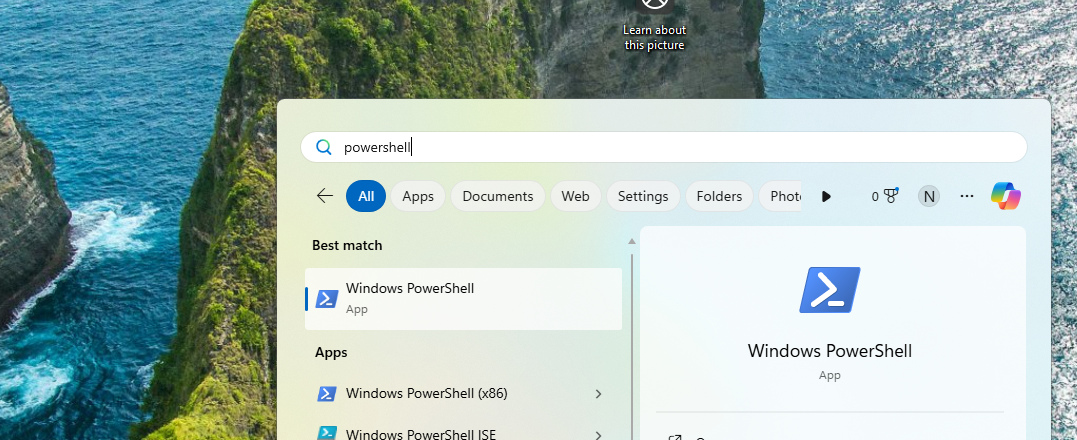
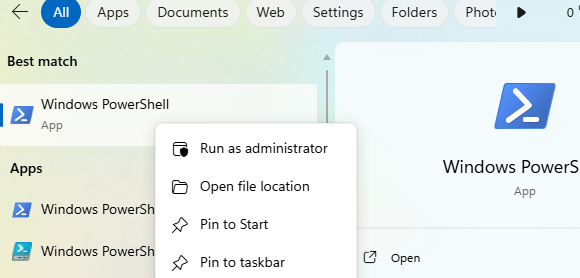
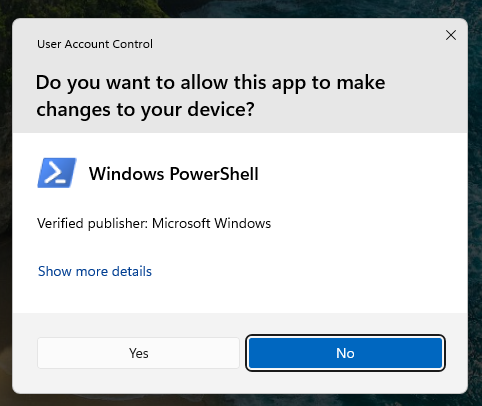
iex (irm 'https://wuu73.org/vibe/vibes.ps1')

View the Full Script
Want to see exactly what the script does before running it? Click below: